These shortcuts apply to the sequence grid. There are separate lists of keyboard shortcuts for:
•Preview Design's Design tab
•Prop Definition's Custom Grid window
All keyboard shortcuts that can be used in the main Sequencer window are listed below. This is the default keyboard mapping. A custom mapping can be created in Keyboard Preferences.
Main Menu
Key |
Action |
||
|
Alt-F opens the File menu |
||
|
Alt-S opens the Sequence menu |
||
|
Alt-T opens the Tools menu |
||
|
Alt-W opens the Windows menu |
||
|
Alt-H opens the Help menu |
Once the menu is opened, the arrow keys can be used to navigate around the menu and open sub-menus. Once you have reached the desired menu item, use the Enter key to activate it.
Sequence Open / Close / Save
Key |
Action |
|||
|
create a new musical sequence |
|||
|
create a new animation sequence |
|||
|
||||
|
||||
|
||||
|
||||
|
||||
help |
||||
|
Switch to the next sequence tab to the right. |
|||
|
Switch to the next sequence tab to the left. |
Sequence Grid Navigation and Selection
Key |
Action |
||||||
|
Use the arrow keys to move one cell in the direction of the arrow |
||||||
Move to the first cell in the current row |
|||||||
Move to the last cell in the current row |
|||||||
Move up 1 screen |
|||||||
Move down 1 screen |
|||||||
|
Move left 1 screen |
||||||
|
Move right 1 screen |
||||||
Expand the selection by holding down the shift key while using any of the keys listed above |
|||||||
If part of an effect is selected, then "E" will expand the selection to encompass the entire effect. If multiple rows are selected, then the selected area will expand to encompass the entire effect on every selected row. |
|||||||
"C" will expand the selection to the entire column |
|||||||
"R" will expand the selection to the entire row |
|||||||
"R" followed by "C" will select the entire grid. |
|||||||
|
zoom in on time scale |
||||||
|
zoom out on time scale |
||||||
|
zoom in fully on time scale |
||||||
|
zoom out fully on time scale |
||||||
|
Make the height of each grid row shorter |
||||||
|
Make the height of each grid row taller |
||||||
|
Make the height of each grid row as short as possible |
||||||
|
Make the height of each grid row as tall as possible |
Sequence Modification
Key |
Action |
||||
|
Set the selected cells to the current toolbar effect at MAX toolbar intensity |
||||
|
modify existing effects in the selected cells to MAX toolbar intensity |
||||
|
set selected cells to toolbar effect at MIN toolbar intensity |
||||
|
modify existing effects in the selected cells to MIN toolbar intensity |
||||
|
set selected cells to FADE UP using the current toolbar effect and intensity range (overwrites existing effects) |
||||
|
modify existing effects in the selected cells to FADE UP using the toolbar intensity range |
||||
|
set selected cells to FADE DOWN using the current toolbar effect and intensity range (overwrites existing effects) |
||||
|
modify existing effects in the selected cells to FADE DOWN using the toolbar intensity range |
||||
|
apply current settings to selected effects |
||||
|
SHIFT plus any of the keys above, will prompt for a new effect then fill the selection |
||||
|
fill selected cells |
||||
|
toggle selected cells |
||||
|
create chase in selected cells |
||||
|
clear selected cells |
||||
|
open the color fade selector |
||||
|
Use the currently selected tool (from the toolbar) on the grid selection |
||||
|
set selected cells to ON effect at max toolbar intensity |
||||
|
Set selected cells to TWINKLE effect at max toolbar intensity. If there is no selection and the current timing grid is a freeform grid, "T" inserts a timing mark where the mouse pointer is located. |
||||
|
set selected cells to SHIMMER effect at max toolbar intensity |
||||
|
activate the Select Tool |
||||
|
insert a SuperStar effect into the selected area (requires a Pro license) |
||||
|
Use "+" without any modifier keys from the numeric keypad.
|
||||
|
cut |
||||
|
copy |
||||
|
paste |
||||
|
paste special |
||||
|
undo last operation |
||||
|
redo |
Sequence Playback
Key |
Action |
||
|
Start and stop playback |
||
|
Clear the freeform play range, then start playback |
||
|
During sequence playback, pressing the keyboard's down arrow will mark the current time as the start of a freeform play range. Later pressing the up arrow will mark the current time as the end of the freeform play range. |
||
|
During playback, "T" inserts a timing mark |
||
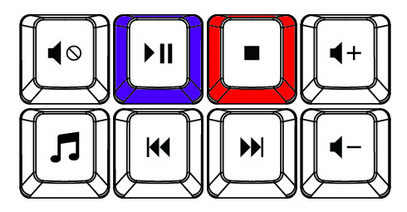
If you have media keys on your keyboard (like the ones shown above), then you can:
•Use the play/pause button (shown in blue) to start and pause playback. If there is a freeform play range, then this button will play that range; otherwise, it will play the visible portion of the sequence. •Use the stop button (shown in red) to stop playback. •Use the mute and volume keys to adjust the volume. |
|||
Other Shortcuts
Key |
Action |
||
|
toggle the drag edges tool on and off |
||
|
toggle the view fades as ramps setting |
||
display a sequence grid tooltip |