A cell, or a range of cells, can be selected in the sequencing grid, allowing you to apply various tools to it (such as specifying what lighting effects should be placed in that cell). You can recognize the currently selected cell (or cells) by a thick dashed yellow border. For example, in the following sequence, a cell on the first row is selected between 3.00 seconds and 3.50 seconds:

A cell on the first row is selected
In the sequencing grid, you can select an area using the:
When using the mouse, the area that gets selected depends on the Selection Mode.
Selection Modes
There are 5 selection modes: cells, effects, effect segments, rows, and freeform. The selection mode determines the area of the sequence grid that gets selected when you use your mouse. The selection mode is always "cells" when using the keyboard.
You can designate one of the 5 modes as the Primary Selection Mode and another mode as the Secondary Selection Mode:
•The primary selection mode is invoked when selecting with the mouse and the Ctrl key is not pressed.
•The secondary selection mode is invoked when selecting with the mouse and the Ctrl key is pressed.
Thus, you have 2 selection modes that are quickly accessible: chosen by whether or not you hold the Ctrl key down while selecting with the mouse.
You can set the primary and secondary selection modes by clicking on the small down arrow to the right of the Select Tool on the toolbar. Use the first 5 options on the menu to choose the primary selection mode. Use the 5 options under the "With CTRL key" sub-menu to select the secondary mode.
The "Save as defaults" menu option saves the current primary and secondary modes as defaults. These will be used as the initial settings whenever you open a sequence.

The Selection Mode menu
Select Cells
When the selection mode is set to "Cells", the grid selection always starts and stops on a timing mark. In the following picture, the sequence has a fixed timing grid with timings every half second. No matter where you click between 1.0 and 1.5 seconds, the selection will start at 1 second and stop at 1.5 seconds - on the timing marks.

The Door channel is selected between 1.0 and 1.5 seconds
Click and drag the mouse to select a larger area:

Selecting multiple cells
Select Effects
When the selection mode is set to "Effects" and you click on an effect, the entire effect is selected - the selection is not constrained by the timing marks. In the following example, a chase runs across 8 rows and clicking on any part of an effect will select the entire effect.
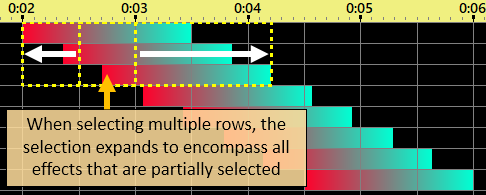
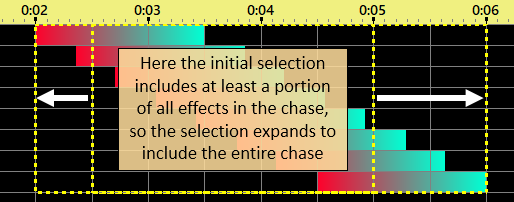
You can also expand the current selection to encompass the entire effect (or effects) by using the "E" shortcut key or choosing Select > Effect from the sequence grid's right-click context menu.

"Effects" selection mode - mouse click

"Effects" selection mode - mouse drag

"Effects" selection mode - mouse drag
Note that the logic for "Select Effect" only selects the first effect in each row of the initial selection. So if the initial selection is this:
![]()
Then the "Select Effect" logic will only select the first effect:
![]()
Select Effect Segments
The "Select Effects" mode (described above) will include any fade up or fade down in the selection. The "Select Effect Segments" is similar, but the selection will stop at a fade up or fade down.

Select Effect Mode vs. Select Effect Segment Mode
Select Rows
When the selection mode is set to "Rows", clicking anywhere on a row will select the entire row. In the following example, clicking on a single cell of the "01.02-Roof B" channel results in the entire row being selected. This mode can be especially useful when copying and pasting the sequencing from one channel to another.
You can also expand the current selection to encompass the entire row (or rows) by using the "R" shortcut key or choosing Select > Row from the sequence grid's right-click context menu.

"Rows" selection mode - mouse click

"Rows" selection mode - mouse drag
Freeform Selection
When the selection mode is set to "Freeform", your selection is not constrained by the timing marks - the selection starts where you pressed the left mouse button and stops where you released it. In the following example, the mouse button was pressed at 0.3 seconds and released at 1.3 seconds.

"Freeform" selection mode
Grid Selection Using The Mouse
Click On The Grid
|
When you click on the sequence grid, a portion of the channel you clicked on will get selected. Exactly which portion gets selected depends on the Selection Mode (as described above). If you select a motion effect, that effect starts playing in the Playback Window. |
Click And Drag
Select multiple cells by clicking on a cell and then dragging the mouse across the range.
|
If you drag with the left mouse button depressed, what happens after the button is released depends on the Primary Selection Mode and which tool is selected on the toolbar. For example:
|
||
|
If you drag with the right mouse button depressed, after the button is released the grid's context menu will open |
||
|
Holding the Ctrl key down while dragging switches to the Secondary Selection Mode. This allows you to quickly switch between 2 different selection modes - just by holding the Ctrl key down or not.
|
Expanding the Selection
|
Expand the selection by shift-clicking on a cell. |
Double-Click Selection And Edit
|
Double-clicking on any portion of an effect in the sequencing grid will select the entire effect, then open a dialog window that allows the effect to be modified:
•Regular Channels - effect can be changed from intensity, shimmer, twinkle, or DMX intensity •RGB Channels - colors can be modified •SuperStar Effects - SuperStar is opened, allowing the effect to be edited •Other Motion Effects - the Motion Effect Generator is opened •Loops - the repeat count and speed can be modified
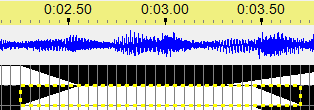
If the effect is modified and the user clicks “OK”, then those modifications are applied to the selected cells. In the following picture, one of the cells in the second row was double-clicked, causing all of the cells for that effect to be selected (including the ramp up and ramp down portions).
There is a user preference option that switches how this action is invoked to Ctrl-Shift Double-Click. |
Keyboard Selection
The keys listed here are part of the default mapping. You can change the key mapping by selecting Tools > Keyboard Preferences.
Key |
Effect |
||||||
|
Use the arrow keys to move one cell in the direction of the arrow |
||||||
Move to the first cell in the current row |
|||||||
Move to the last cell in the current row |
|||||||
Move up 1 screen |
|||||||
Move down 1 screen |
|||||||
Expand the selection by holding down the shift key while using any of the keys listed above |
|||||||
If part of an effect is selected, then "E" will expand the selection to encompass the entire effect |
|||||||
"C" will expand the selection to the entire column |
|||||||
|
Ctrl-A will select the entire grid. |
Right-Click Context Menu, Select sub-menu
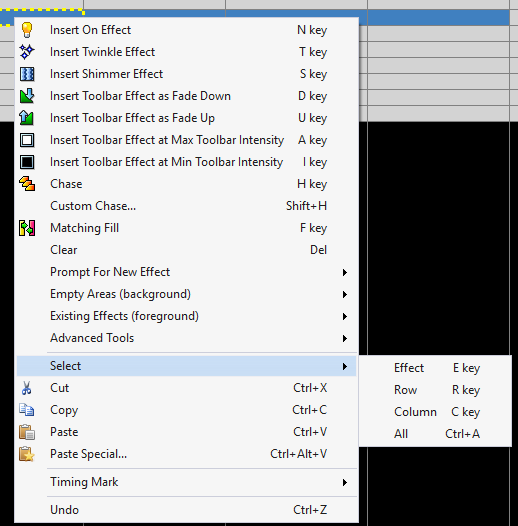
Right-clicking in the sequencing grid provides many options, including grid selection. From the Select sub-menu, you can expand the current selection to encompass:
•any partially selected effects
•the entire column or columns
•the entire sequence grid

Right-click context menu with Select sub-menu shown


