The Standalone tab of the Light-O-Rama Hardware Utility can be used to send an animation sequence to a Light-O-Rama controller, which can later run that sequence independently, in "standalone" mode, without being hooked up to a computer running Light-O-Rama software.
When a unit runs a sequence in standalone mode, it not only executes the lighting commands in the sequence that are for that controller itself, but also, if the sequence contains any commands for other units, it will transmit them to the other units that it is connected to. In this way, a single controller can be downloaded with a sequence, and act as a "director" for several linked controllers.
It is important that only one controller in any mutually connected group act as a director. Downloading sequences to two separate controllers that are hooked up in a mutually connected group will have undesired results, as the commands transmitted by the two will interfere with each other. Similarly, it is important not to also control sequences from your computer while you have a controller hooked up to it acting in standalone mode, for the same reason.
Normally, the controller will execute the standalone sequence any time that it is powered on. However, some controllers have inputs that can serve as a trigger to start the sequence. If a controller supports triggers, it is input #1 that will start the sequence. See the Hardware Utility's Product Matrix to see which controllers support triggers and standalone sequences.
Note: The CTB08 (first generation) controller does not have transmit capability in standalone mode.
To load a sequence into a controller to be used in standalone mode, take the following steps:
You can also use this section of the Hardware Utility to choose the action that will start the sequence (for controllers that support this), to remove the standalone sequence from a controller, and to test a standalone sequence.
Create the Sequence
Using the Sequencer, create an animation sequence. Musical sequences can be loaded but the music will be ignored. When you create the sequence, associate it with a preview that has the appropriate unit IDs and circuit numbers, as normal.
Some controllers have very little storage space for sequences. Because size is a limiting factor, you should consider the following tips to keep your sequence's size at a minimum:
•Fade commands take up the most space.
•The least space is used when all lights on a controller are at either 100% or 0% intensity.
•When possible, place similar commands at the same time. For example, if you turn one circuit of a controller off and then, a tenth of a second later, turn another circuit on the same controller off, that will take about twice as much space as would turning both of them off at the same time.
•Different types of controllers have different maximum sequence sizes; controllers such as the CTB08 have little space and can handle only very simple animations.
Also, sequences to be used in standalone mode have some limitations:
•You can load sequences in the legacy format (.las) or in the modern format (.loredit)
•The sequence's preview should only contain props that are on the Regular LOR network; sequencing on other networks is ignored.
•The sequence cannot contain motion effects.
•Timings are only supported on tenth-of-a-second boundaries (for example, 1 second, 1.1 seconds, 1.2 seconds). If any timings in the sequence are at some centisecond other than a tenth-of-a-second boundary (for example, 1.15 seconds), they will be considered to be at the next tenth-of-a-second boundary.
Sequences with loops are allowed.
Scan for the Controller
•If you haven't already done so, plug a Light-O-Rama USB adapter into an available port. Connect a Cat5 or Cat6 cable from the adapter to the controller. Plug the unit into an AC outlet, and turn the unit on.
•Open the Light-O-Rama Control Panel and navigate to the Hardware Utility section.
•Make selections in the Ports to Scan and Scan For boxes.
oIf you do not remember the unit's current unit ID, or if the controller doesn't seem to be reacting to its current ID, select "Advanced (Unknown Id)" in the "Scan For" box. If you select this option, make sure that you have just one controller connected. Otherwise, all units that are connected to the PC will load the sequence.
•Click the "Scan" button
•Wait for results to appear at the bottom of the page
•Find the device that you are going to load the sequence into and click the "Configure" button

Click the "Configure" button to access standalone sequence options
Download the Sequence
•After clicking the "Configure" button, select the "Standalone" tab.
•Click the "Open" button to select your sequence.
•If the sequence is too large, you will see a message indicating how much it is over. You will need to go back and edit your sequence to reduce the number of channels and/or the number of effects.
•Select the action that will start the sequence. Only controllers with "Yes" in the "Test Triggers" column of the Product Matrix support starting the standalone sequence on an input (see the controller's manual for information on wiring the input).
•Click the "Load" button to send the sequence to the controller. The progress bar will indicate how far along the load process is. Do not leave the Standalone page or close the Control Panel until the load has completed.

The Standalone Sequence tab
Testing the Sequence
After loading a sequence into a controller to be used in standalone mode, it is recommended that you test the sequence, using the buttons in the "Test Sequence" section. To start the sequence, click "Sequence ON"; to stop it, click "Sequence OFF".
Note that the "Sequence OFF" button will stop the sequence even if it was started automatically (by powering on or by schedule, as opposed to via the "Sequence ON" button).

Testing the sequence
Removing the Sequence
To remove a downloaded sequence from a standalone controller, use the "Delete" button in the "Remove Sequence" section:

Removing a sequence
Note: This does not actually remove the sequence from the controller; rather, it makes it so that the controller will no longer play the sequence. So, if you later decide to use the sequence again, you can simply change the start action, rather than downloading the sequence again.
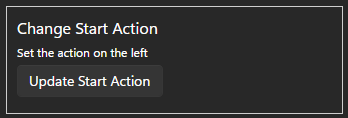
Change Start Action
After loading a sequence into a controller, you can later change the action the starts the sequence. Simply select the start action on the left side of the screen, then click the "Update Start Action" button on the right.