For most musical sequences, the Sequencer can display a waveform of the audio at the top of the sequence grid. This can be useful for visually matching up timings and events to the sound. The Waveform Display supports a wide range of media types, including video media. However, not all types of media or media containers are supported (for example, midi files are not supported).
In addition to the waveform itself, a vertical highlight bar is displayed at the current time that your mouse is pointing at.
Right-clicking on the waveform or the time scale will open a menu that allows you to:
•Scale and filter the waveform
•Change the waveform area colors

Waveform area height set to large and the right-click menu displayed
Zooming In And Out
The first 2 options on the menu allow you to zoom the time scale in and out.
The next 3 options zoom to a fixed time scale: 5, 10, or 15 seconds wide. These can quickly take you to a reasonable time scale if you have zoomed in too far.
You can also zoom in by left-clicking on the waveform and dragging across the area of the waveform where you want to zoom. When you release the mouse button, the new zoom level will take effect. Note that this only works in the waveform area, not on the time scale.

See the Zoom topic for more ways to zoom the sequence grid in and out.
Setting The Freeform Play Range
The "Set Play Range Start" and "Set Play Range End" menu items can be used to create or extend a freeform play range.
Scaling And Filtering The Waveform
The Sequencer will automatically scale the audio waveform vertically so that it fills the entire height of the waveform area. By default, all audio frequencies are displayed.
You can zoom the waveform up or down, or apply a frequency filter by choosing "Waveform Filter & Scale" from the right-click menu.

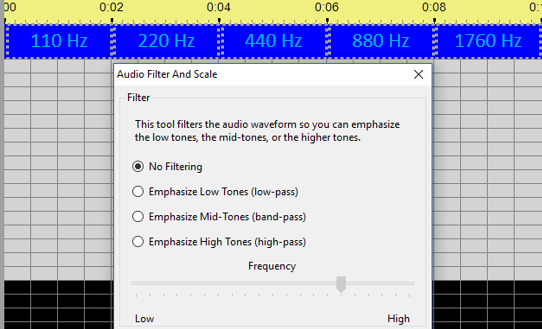
The Audio Filter and Scale dialog
No Filter
The following screens are taken from a sequence that uses a specially constructed audio file. The audio consists of 5 tones, each 2 seconds long and each one an octave higher than the previous tone (10 seconds total). The first 2 seconds have a 110 Hz tone (A2), followed by 2 seconds at 220 Hz (A3), followed by 2 seconds at 440 Hz (A4), followed by 2 seconds at 880 Hz (A5), followed by 2 seconds at 1760 Hz (A6). Here is what the waveform looks like with no audio filtering:
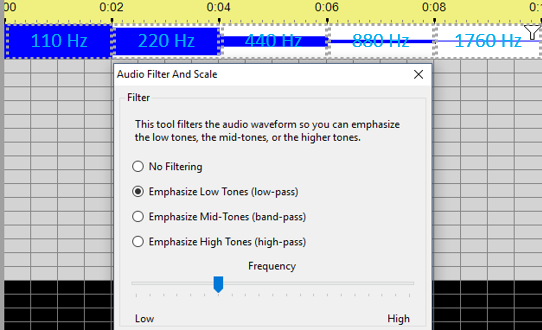
Emphasize Low Tones
Here is the same sequence with the low tones emphasized. Notice that the frequency cut-off for the filter is adjustable using the slider.
Emphasize Mid Tones
Here is the same sequence with the middle tones emphasized. Notice that the mid-point frequency for the filter is adjustable using the slider.

Emphasize High Tones
Here is the same sequence with the high tones emphasized. Notice that the frequency cut-off for the filter is adjustable using the slider.

Scaling the Waveform
You can use the bottom section of the "Audio Filter and Scale" dialog to scale up low level audio signals to see more detail. The next example shows how this can be used to see where the beats are more clearly.

Increasing the vertical scale of the waveform
Setting The Waveform Area Height
The height of the waveform area can be set to small, medium, large, or hidden -- small is the default for musical sequences. Choose “Large” to see the maximum amount of detail in the waveform. Choose “Small” to see the waveform, but have more room to display the sequence. The height can be changed by selecting Sequence > Waveform Area from the main menu, or by right-clicking inside the waveform area.
![]() You can also click on the waveform icon on the toolbar to hide or unhide the waveform area.
You can also click on the waveform icon on the toolbar to hide or unhide the waveform area.

The waveform area right-click menu
Changing the Waveform Area Colors
The colors used to display the waveform can be changed via the Waveform Colors dialog, which can be opened by right-clicking on the waveform and selecting "Waveform Colors" from the pop-up menu:

The Waveform Colors dialog
Three different colors can be set: "Foreground" is the color of the wave itself; "background" is the field that it is drawn upon; "highlight" is the vertical bar showing the position of the mouse.
The colored buttons on the left can be used to set each of these three colors, and the display on the right shows how a sample waveform would look using these colors.
The Sequencer will remember the colors that you chose, so that other waveforms will automatically be displayed using those colors.
You can revert to the system default of blue on white by clicking the "Set Defaults" button.

The Waveform Colors dialog, with different colors chosen