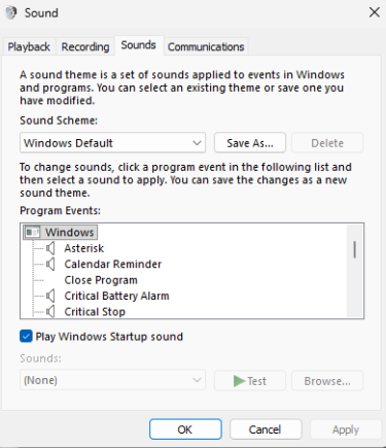
While using a dedicated PC to run a Light-O-Rama show, various Windows related events can interrupt a live show. Some of these events include automatic software updates, screen savers, sleep/hibernation, other audio devices, etc. Below are best practice configurations to help reduce show interruptions.
-“Launch at startup” - Ensure the Light-O-Rama Control Panel is set to “Launch at startup”
-WiFi - Enabled if using the LOR mobile app.
-Automatic Windows Updates - “Pause” Windows updates.
-Automatic Windows Updates - “Active hours”
-Screen Saver - Disable
-Screen Time Out/Sleep and Hibernation - Disable
-Volume Mixer - Adjust audio mixer to mute sources like “System Sounds” and any other sources other than the Light-O-Rama application(s).
-Audio Playback - If multiple playback outputs are available, consider disabling audio playback devices that are not connected to light show sound system speakers, FM transmitter, amplifiers, etc. This can be common if an HDMI monitor is connected to the PC. Also consider setting the primary audio playback device as the “Default Device”
Launch at startup:
This will automatically start the Light-O-Rama Control Panel after the Windows Desktop is logged into. Open the Light-O-Rama Control Panel and check the box next to Launch at startup.

WiFi:
Show PCs need an active internet connection to use the Light-O-Rama Mobile App. Many times, WiFi may be turned off to prevent Windows updates. Disabling WiFi can prevent the Light-O-Rama Mobile App from functioning. If use of the Light-O-Rama Mobile App is preferred, ensure WiFi is on and connected. Alternatively, connect the Show PC directly to your internet router using an ethernet cable. Ensure to “pause” updates or adjust the “active hours” for internet connected Show PCs. See the “Automatic Windows Updates” section to do so.
Automatic Windows Updates - “Pause” Windows updates:
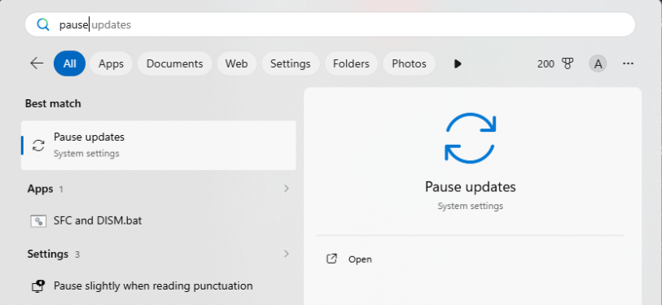
Pausing Windows Updates is preferred to prevent unattended Windows updates and Show PC restarts. Use the Windows search bar or magnifying glass icon and search “Pause updates”. Select Pause updates.
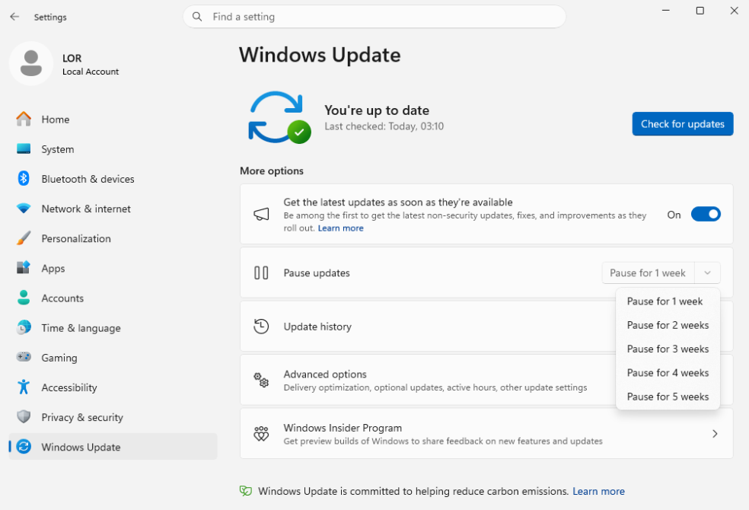
Click the Pause updates drop down box. Select a time period and close the window.
Automatic Windows Updates - Active hours
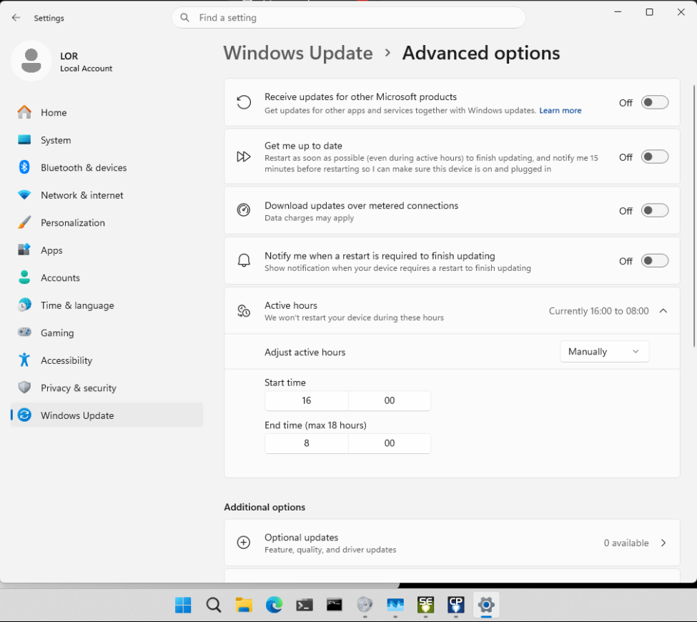
This configuration is ONLY required if having the latest Windows updates is necessary. Many times, the period for Active hours may be 8am through 5pm. This configuration may cause Windows updates to occur during show times between 5pm and 8am. Adjusting the Active hours to include Light-O-Rama show times can prevent the Show PC from restarting during a show.
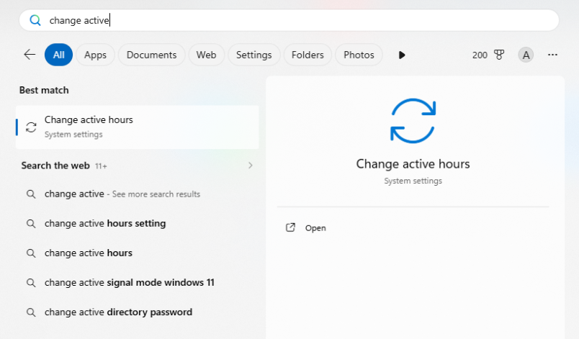
Use the Windows search bar or magnifying glass icon and search “Change active hours”. Select Change active hours.
Change the Active hours option from Automatically to Manually, set the start/end times, and close the window. The active hours in this example are from 16:00 to 8:00 (4pm to 8am).
Note: If a Show PC is restarted, it may require a desktop login password before the Light-O-Rama Control panel will launch. Automatic Windows Desktop login configurations are beyond the scope/support of Light-O-Rama.
Screen Saver – Disable:
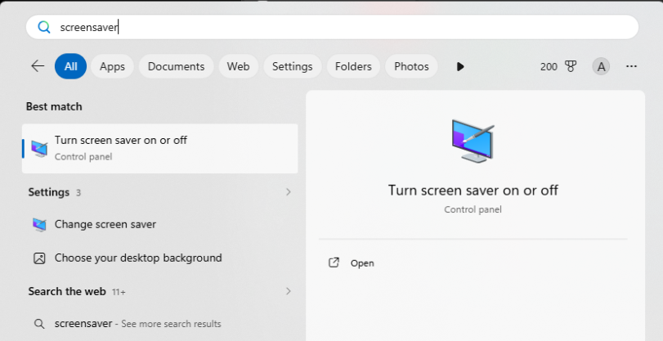
Search the Windows menu for “screen saver.” Select Turn screen saver on or off.
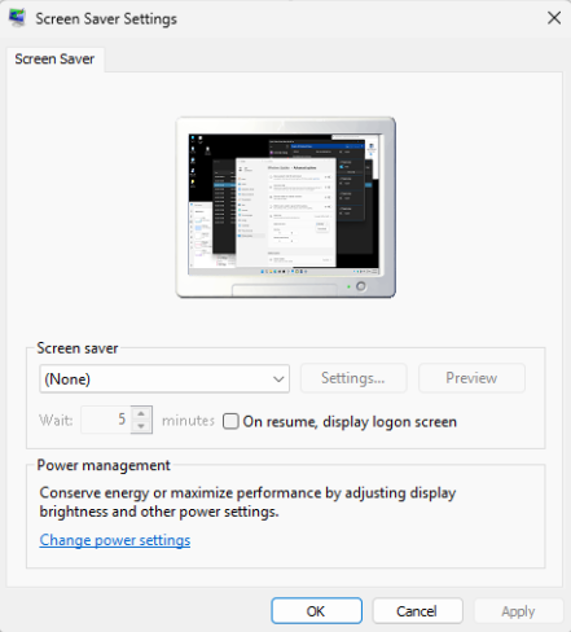
Ensure the drop menu for Screen saver is set to none. Click “OK”
Screen Time Out/Sleep and Hibernation – Disable
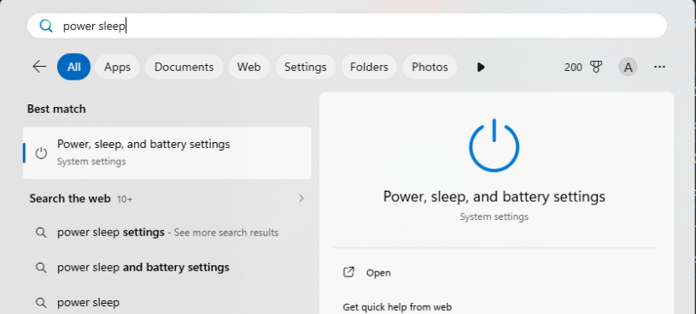
Search the Windows menu for “Power sleep”. Select Power, sleep, and battery settings.
Click the drop menu for “Screen, sleep, & hibernate timeouts” within the “Plugged in” section. Ensure each is set to “Never”. Close the Window.
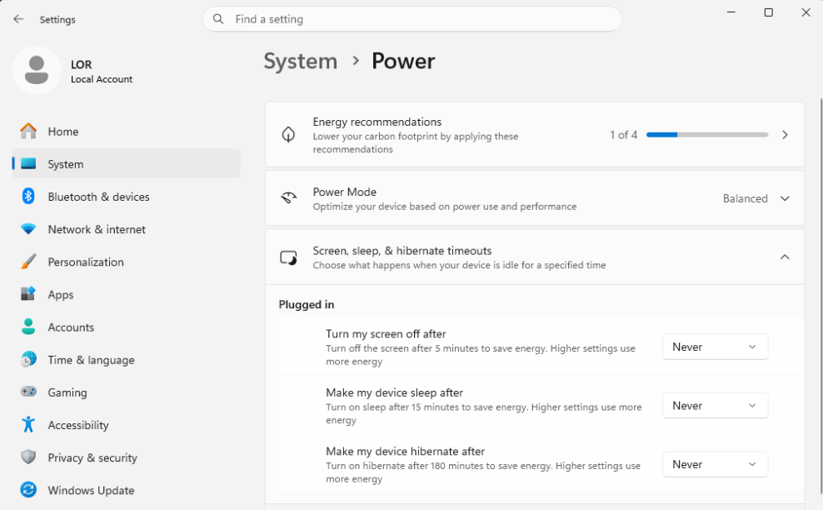
If the Show PC is a laptop, there may be additional “on battery” options. The “on battery” options of “Never” are not necessary if the PC is connected to its charger.
Volume Mixer:
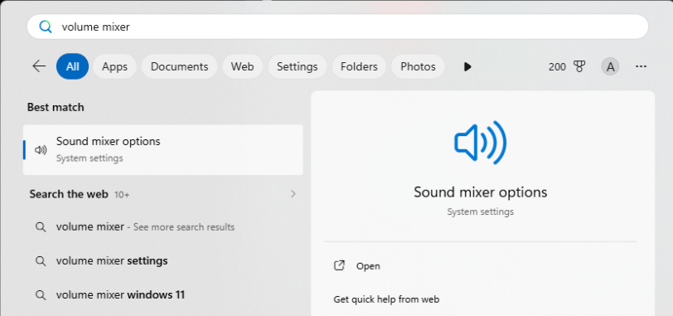
Search the Windows menu for “volume mixer” and select “Sound mixer options”.
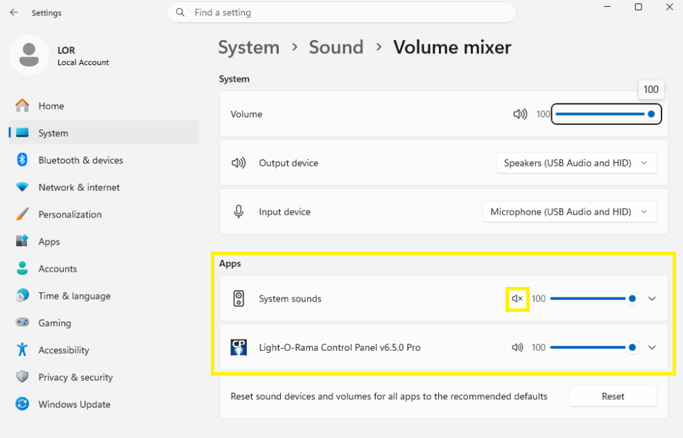
In the Apps section, the Light-O-Rama Control panel is displayed along with other applications. Click the speaker icon next to the volume slider to mute other applications and System sounds. It’s muted as indicated with an “x” next to the speaker icon.
Audio Playback:
Search the Windows menu for “system sounds” and select “Change system sounds”.
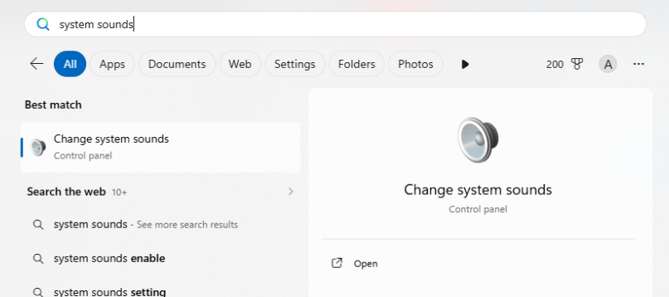
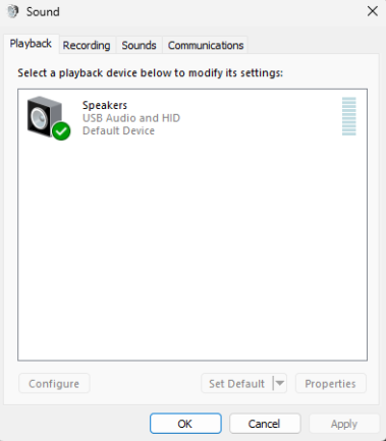
Select the Playback tab. Within the playback tab, all connected audio playback devices will be listed. If more than one is listed, right click on your primary device such as USB Audio, or PC Speakers etc., and set as the “Default Device”. This will ensure the sound output remains on your primary audio device when other devices are connected such as HDMI monitors, laptop docks, etc.